
Stencils for Sign Painting: Materials, Prep and Technique
A stencil can improve repeatability and edge control, but it cannot rescue a dirty surface, incompatible paint, weak layout, or rushed application. Match the stencil system to the substrate and the finish the project actually needs.
Key takeaways
- Choose stencil stock by surface shape, detail, paint method, required reuse, and removal—not by one “best material” claim.
- Test the complete stack on a hidden area or sample: substrate, existing finish, cleaner, stencil adhesive, paint, and any topcoat.
- Registration marks, bridges, level reference lines, and a dry placement check prevent layout errors before paint is involved.
- Control paint at the stencil edge and follow the paint and stencil makers’ application and removal windows.
- The customer should use qualified field professionals for elevated, traffic-exposed, regulated, large multi-layer, hazardous-coating, or access-sensitive work.
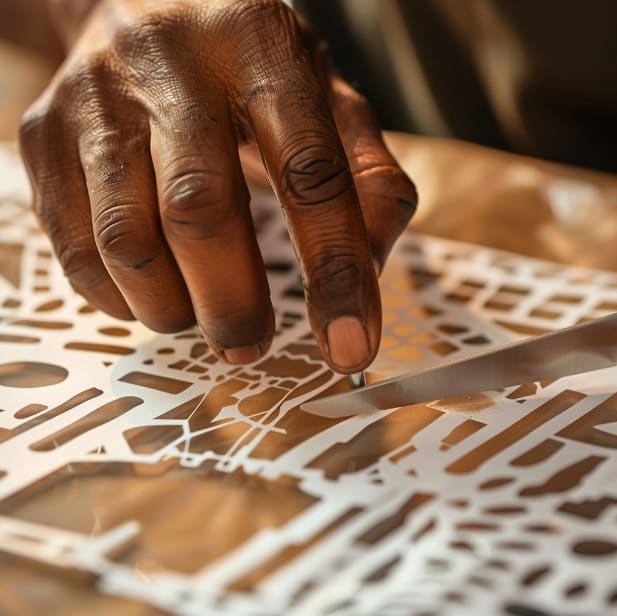
Stencils are production tools. They can repeat a logo, align a set of suite numbers, control a painted border, or transfer lettering without redrawing every element. The finished quality still comes from the artwork, bridges and registration, surface, coating system, and application.
A small ground-level sample can validate a production concept. A multi-color storefront wall, elevated facade, traffic marking, or regulated message has different access, overspray, safety, and approval consequences. This article provides bounded planning information, not a universal do-it-yourself prescription.
LA Prime Signs can cut stencil components and produce painted signs or panels in the shop from approved artwork and verified dimensions. It does not survey or prepare walls, field-measure layouts, apply paint on site, coordinate access, or install finished work. The customer and qualified field professionals remain responsible for the substrate, placement, environmental controls, code requirements, access, and application.
Which stencil material fits the sign-painting job?
Compare the stencil's thickness, flexibility, edge detail, adhesive, paint resistance, cleaning method, and expected number of uses. Woodland Manufacturing's stencil-material overview illustrates common categories, but the named material and adhesive still need to be checked against the project.
- Reusable polyester film: can work for repeated flat or gently curved applications. Thicker stock may resist distortion but bridge texture and tight curves more readily.
- Metal: useful for durable repeat marking where the edge detail, cleaning chemistry, corrosion resistance, and handling suit the task. Sharp edges and electrical or heat hazards need control.
- Adhesive-backed stencil film: can conform closely and reduce lift on smooth compatible surfaces. Adhesive residue, paint pull, surface staining, and one-time use should be tested.
- Paper or oilboard: can serve simple limited-run work, but moisture, tearing, distortion, and edge wear reduce repeatability.
Also review the artwork. Enclosed counters in letters such as A, O, and R need bridges or separately placed centers. Very fine lines may not survive cutting, paint application, removal, or the intended viewing distance.
How should the surface be prepared?
Preparation begins by identifying what is already there. Painted wall, raw wood, coated metal, glass, masonry, and plastic require different cleaners, primers, and adhesion expectations.
- Inspect: look for loose coating, chalk, grease, silicone, wax, salt, moisture, texture, cracks, and old adhesive.
- Clean compatibly: use the substrate or coating maker's approved process, then allow the surface to reach the required dry condition.
- Stabilize first: do not stencil over peeling paint, active corrosion, wet material, or crumbling masonry.
- Test the system: check cleaner, stencil tack, paint adhesion, edge quality, removal, and appearance on a sample or inconspicuous area.
Do not sand, scrape, or solvent-clean an unknown legacy coating without considering hazardous-material and ventilation requirements. Buildings and old sign panels can contain substances that should be assessed and controlled by qualified parties.
How should a stencil be positioned?
Prove placement before removing a liner or opening paint:
- Establish reference lines: use site measurements, a level or laser, and non-damaging marks appropriate to the surface.
- Check the viewing position: optical centering can differ from mathematical centering, especially around doors, seams, and asymmetrical logos.
- Use registration: multi-part or multi-color work needs repeatable marks that stay outside the finished graphic or can be removed cleanly.
- Dry-fit everything: verify spelling, orientation, bridges, panel order, clearances, and scale from the expected viewing distance.
If a repositionable spray adhesive is proposed, confirm that both the stencil and substrate manufacturers permit it. Control ventilation and overspray, protect surrounding finishes, and test for staining or residue.
How should paint be applied through a stencil?
The objective is controlled coverage without forcing paint beneath the edge. Brush, stencil brush, foam roller, aerosol, and spray equipment load the stencil differently. Stencil Ease's selection guide is a useful starting reference for stencil stock; the coating data sheet should govern surface, temperature, recoat, application, ventilation, and PPE requirements.
- Use a compatible coating: match it to substrate, existing finish, interior or exterior exposure, and the selected application tool.
- Control loading: several controlled passes may reduce pooling compared with one heavy application, subject to the coating instructions.
- Avoid driving paint under the edge: use the approved brush, roller, or spray technique and keep the stencil fully supported.
- Prove each color: test opacity, bleed, drying, overlap, and registration before beginning a full multi-layer set.
Spray paints, adhesives, and solvent coatings can create flammable vapor, overspray, and inhalation or skin hazards. Follow labels and safety data sheets, provide required ventilation and respiratory or other protection through the applicable safety program, control ignition sources, and comply with site restrictions.
When should the stencil be removed?
There is no universal “slightly tacky” rule. Some systems release best within a defined wet or early-dry window; others require more set time. Film type, paint chemistry, coat thickness, temperature, surface texture, and edge geometry all change the result.
- Use a test panel: record the removal timing and angle that produces the cleanest edge without lifting the base finish.
- Work in a controlled sequence: avoid dragging the removed stencil through wet areas or dropping adhesive onto finished paint.
- Watch bridges and corners: stop if the paint film begins to tear and follow the coating-approved correction method.
How should a stenciled sign be finished and maintained?
Inspect the work from close range and intended viewing distance. Correct only after the paint reaches the condition required by its manufacturer; rushed touch-ups can smear edges or create a different sheen.
- Do not clear-coat automatically: confirm chemical compatibility, cure time, adhesion, gloss, UV exposure, and whether the topcoat will alter color or make future repair harder.
- Clean reusable stencils safely: use only methods compatible with the stencil stock and paint, with appropriate chemical controls.
- Document products and colors: retain labels, batch information, samples, and maintenance instructions for future repair.
- Match exposure: coastal salt, inland heat and UV, irrigation, abrasion, and repeated cleaning may require different coating and inspection plans.
Which field decisions belong to the customer and qualified professionals?
The customer should assign qualified professionals when the work involves:
- elevated access, public protection, traffic control, or restricted work hours
- large layouts or multi-color registration where a placement error would be costly
- rough, historic, damp, failing, or potentially hazardous existing finishes
- specialty substrates, regulated messages, landlord criteria, or jurisdiction review
- spray application or coatings that require controlled equipment and safety procedures
For shop-made work, compare hand-painted sign production with a cut stencil, printed graphic, or painted panel. The customer and installer must separately validate the receiving surface, coating system, placement, site preparation, access, and field application.
How should a stencil project begin?
For production, provide vector artwork, customer-verified finished dimensions, quantity and repetition, colors, intended substrate, interior or exterior exposure, and the desired edge character. Note whether the mark must be mechanically consistent or whether hand-painted variation is welcome. If a third party will apply a supplied stencil, include its approved material and handoff requirements; the installation-ready production guide explains the responsibility boundary.
Request a stencil or painted-sign production quote. LA Prime Signs can compare supported shop-production approaches, while field testing, surface preparation, paint application, mounting, and installation remain outside its scope.
FAQ
Which stencil material is best for sign painting?
It depends on the job. Reusable polyester film can suit repeated flat work, adhesive vinyl can improve edge contact for a one-time design, metal can serve durable repeat marking, and paper or oilboard may suit limited use. Confirm compatibility with the surface, paint, and removal plan.
How can paint bleed under a stencil be reduced?
Start with a clean, stable surface and full edge contact, then use a compatible paint and controlled application rather than flooding the edge. Texture, gaps, heavy coats, angled spray, and excess brush loading can all increase bleed. Test the method first.
When should a stencil be removed?
Follow the paint and stencil manufacturers’ instructions. The correct window varies by coating, film, temperature, thickness, and surface; removing too early can smear, while waiting too long can bridge the paint film or increase adhesive transfer.
Which paint should be used for a stenciled outdoor sign?
Choose a coating system approved for the exact substrate, existing finish, preparation, exposure, and application method. “Acrylic,” “enamel,” and “clear coat” are broad categories, not universal outdoor specifications.