
Vinyl Graphics Production: Preparing a Clean Installer Handoff
A clean vinyl graphic begins with compatible media, approved artwork, accurate production, labeled panels, and a handoff that gives the customer or qualified installer the product-specific field requirements.
Key takeaways
- Select film by substrate, shape, finish, removability, print or cut method, expected service, exposure and the media maker’s approved applications—not by color alone.
- The customer and qualified installer must verify paint cure, glass treatment, surface energy, texture, sealants, contamination, temperature and owner permission before field application.
- Squeegee angle, pressure, overlap and sequence vary with the media and application tape; no universal technique guarantees a bubble-free result.
- Curves, recesses, seams, compound shapes, large panes, vehicles and exposed edges require material-specific limits and qualified field judgment.
- Small bubbles, edge lift, stretch and contamination need diagnosis by the responsible installer. Puncturing, heating or repeatedly pressing them is not a universal repair.
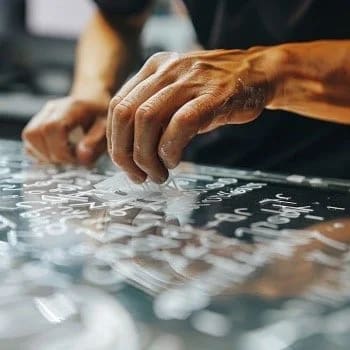
The vinyl and decal production category includes window decals, door lettering, wall graphics, and selected vehicle films that can look deceptively simple because the visible layer is thin. Finished quality depends on what cannot be seen in a proof: adhesive chemistry, customer-verified surface condition, film construction, application tape, panel shape, temperature, installer access, and how the edges will live.
“Perfect,” “flawless,” and “bubble-free every time” are not useful production promises. A useful production brief defines acceptable appearance, material, panelization, and handoff requirements from customer-supplied information. LA Prime Signs produces the graphics; the customer and qualified installer own final field dimensions, site and surface verification, preparation, access, application, and field acceptance.
Why does surface preparation matter?
Pressure-sensitive adhesive needs intimate contact with a compatible surface. Dust, oil, wax, polish, silicone, cleaner residue, oxidation, uncured paint, outgassing plastic, texture, low-surface-energy plastic, damaged coating and moisture can reduce that contact. Sanding an unknown surface can spread hazardous material, damage a finish and make it rougher; it is not a universal prep step.
The customer and qualified installer should document the substrate, coating, age, and condition and obtain property- or vehicle-owner approval before field testing. Surface cleaning, adhesion testing, primers, and drying time must follow the film and surface suppliers' instructions. A small short-term test does not predict every edge, curve, or year of exposure.
Painted walls deserve special review. Paint chemistry, cure, sheen, texture, additives, cleaners and prior repairs affect adhesion and later removal. A removable-film label does not promise damage-free removal from every paint.
Which tools belong in a controlled application?
The qualified installer may need:
- clean squeegees or rollers with an edge and hardness suited to the media, laminate and application tape;
- layout and masking tools such as approved tape, levels, lasers, marks, magnets or hinges that will not damage the surface;
- surface and environmental instruments for temperature, humidity or other checks required by the procedure;
- cutting and edge tools used only by trained personnel with substrate-safe techniques, blade control and protection for glass, paint, gaskets and people; and
- safe access, lighting and site control appropriate to the graphic size, wind, pedestrians, vehicles and working height.
Heat equipment is not a general-purpose dryer or adhesion cure. It can burn people, over-stretch film, damage paint and seals, create glass stress and start a fire. Use calibrated heat only when the selected media's documented process calls for it and the installer is qualified.
How should a squeegee be used?
The goal is controlled pressure at the advancing application front so adhesive contacts the surface without trapping folds or contaminants. Exact angle, pressure, stroke direction and overlap depend on film stiffness, adhesive, air-egress liner, transfer tape, substrate, graphic size and whether the method is dry or specifically approved as wet.
A fixed 30-degree rule is too precise for an unnamed system. The actual angle, pressure, sequence, tape removal, and face protection belong to the qualified installer's product-specific procedure. The production handoff should identify the media and application tape so that procedure is based on the named system rather than a generic article.
Large graphics require a panel and hinge plan, reference marks, manageable liner removal and enough hands or equipment. If alignment is lost, stop before tension and repeated lifting distort the film.
Which application temperature is correct?
Read the technical bulletin for the exact product. A commonly repeated 59–81°F range may happen to fit some media but cannot govern every cast, calendared, reflective, translucent, textured, wall, window or vehicle film. Minimum application temperature, optimum working range, post-heat requirement and service temperature are different specifications.
Measure the substrate. Southern California glass may remain cool or damp under fog or dew, while metal or a west-facing window can become much hotter than the air in direct sun. Conditions can change while a large application is underway. Plan shade or a different window rather than using improvised heat or rushing.
Acclimate media and the workpiece according to product guidance. Cold rolls, hot panels, wind and dust can change handling even if the air temperature looks acceptable.
How should bubbles and application defects be handled?
Classify the defect before acting:
- air: some approved air-egress films allow small pockets to be worked toward a channel or edge, while other constructions require controlled lifting or replacement;
- water or cleaner: stop rather than sealing moisture beneath film; dry, clean and rework through the supplier-approved method;
- contamination or surface texture: pressing harder will not remove a particle or flatten a surface the film was not designed to bridge; and
- outgassing or adhesive reaction: investigate the substrate, paint cure, plastic or chemical compatibility before replacing the same material in the same way.
Needles can leave visible holes and pathways, heat can distort or gloss the film, and repeated lifting can stretch it or contaminate adhesive. Use only the repair procedure permitted for the named product and acceptance standard.
How are curves, recesses and edges planned?
Complex shapes are a material-selection and installer-qualification issue before they become a technique issue:
- the customer or installer identifies flat areas, curves, channels, recesses, seams, gaskets, coatings, and high-stress zones;
- production selects a film, laminate, print, adhesive, panelization, and seam approach from those verified inputs;
- the handoff records alignment references, product limits, orientation, and replacement-panel logic; and
- the qualified installer controls temperature, positioning, trimming, forming, inspection, and any product-required post-install verification.
Relief cuts and overlaps are not automatically clean or durable. They can expose adhesive, create dirt lines, change graphics and concentrate stress. Full vehicle wraps, bumpers, deep channels and large architectural films generally warrant a qualified specialist; simple car-window decals are a different scope.
Which finishing steps protect the result?
A documented closeout may include:
- pressure verification at edges, overlaps and other zones using the tools and sequence required by the media;
- post-heat or temperature verification only for products and formed areas that specify it, with calibrated measurement;
- edge treatment only where an approved sealer, tape, wrap or termination detail is compatible and required; and
- inspection and handoff covering alignment, wrinkles, particles, edge lift, damage, cleaning limits, dwell, warranty, photographs and responsible maintenance.
Do not promise that a light pass of heat “activates” every adhesive or that every graphic needs 24–72 dry hours. The product documentation and environment set the closeout requirements.
Which mistakes cause avoidable problems?
- Choosing media after the proof: the surface, shape, exposure, removal and service target should inform design and film selection.
- Using a universal cleaner: residue or solvent damage can undermine both adhesion and the underlying finish.
- Installing on an unmeasured surface: air temperature does not reveal hot glass, cold metal or condensation.
- Stretching to rescue alignment: tension can return later as edge lift, distortion, color change or failure in recesses.
- Skipping the acceptance plan: define viewing distance, seams, particles, color, panel alignment and remake responsibility before the finished graphic is judged.
Also verify landlord permission, required business information, visibility, public-way and accessible-route clearance, glass or vehicle restrictions and any sign approval that applies. An easy-to-apply decal can still be prohibited in the chosen location.
Who owns field application?
The customer or their qualified installer owns all field application. High-visibility storefront bands, large panes, tall work, vehicles, textured walls, complex curves, multiple panels, reflective films, specialty glass, and surfaces with uncertain coatings carry higher consequence and warrant appropriately qualified planning. LA Prime Signs does not survey the surface, schedule installers, provide access equipment, or perform field troubleshooting or repair.
Use the installation-ready production and handoff guide to organize customer- and installer-supplied information. Then request a production quote with approved artwork, verified final dimensions, surface photographs, exposure, and desired service period. The production quote covers only the specified graphics and documented handoff; mounting, structural suitability, code, permits, access, installation, maintenance, and field warranties are not included.
FAQ
What temperature is best for applying vinyl graphics?
The qualified installer should use the current application-temperature range for the exact film, adhesive, laminate and substrate and measure the surface. The application range is not the same as the wider service-temperature range after bond develops. Sunlit glass and metal can differ sharply from the air.
How should bubbles in vinyl graphics be repaired?
The responsible installer must first identify air, moisture, contamination, outgassing, texture or material stress. The approved response may be controlled rework or replacement under the named product instructions. Puncturing or heating every bubble can damage the film and affect a product warranty.
Which cleaner should be used before vinyl application?
The qualified installer should use the film and substrate suppliers’ approved cleaning sequence. Isopropyl alcohol may be appropriate in some systems and concentrations, but it is not universal. Household cleaner, wax, silicone, ammonia, strong solvent and residue can cause problems or damage coatings.
Can vinyl graphics be installed outdoors?
Yes, when the selected media is approved for the surface and exposure and the site is dry, clean, safe and within application limits. Wind, dust, coastal moisture, inland heat, direct sun, traffic, access and enough stable time to finish all affect the installation plan.
How long does vinyl adhesive take to build bond?
It varies by adhesive, pressure, substrate, temperature, primer, film construction and exposure. Some technical bulletins specify dwell, post-heat or washing limits. Follow the named product rather than applying a universal 24-to-72-hour cure rule.