
Vinyl Plotters: A Practical Guide to Cut-Vinyl Sign Production
A plotter creates controlled cut paths; approved artwork, the right film, test cuts, weeding, transfer preparation, inspection, and a labeled installer handoff make the finished product.
Key takeaways
- A vinyl plotter follows vector paths with a swiveling or controlled blade to make kiss cuts, through cuts or perforations only when the machine and media support them.
- Blade type and extension, force, speed, acceleration, offset, overcut, tracking, pinch-roller placement and media condition are product- and machine-specific.
- The production chain is artwork review, media identification, loading, test cut, cutting, weeding, transfer preparation, quality check, labeling and installer handoff.
- Final field dimensions, surface verification, mounting or application decisions, access and installation remain with the customer and qualified installer.
- Confirm the responsible equipment and shop capability; a general article does not prove LA Prime Signs owns a particular cutter or stocks every specialty film.
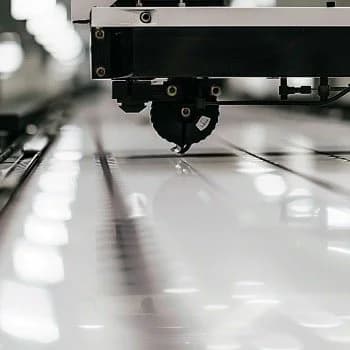
Crisp door hours, simple logos, frosted privacy bands, paint masks, labels, and other cut-vinyl lettering products often begin as cut film rather than a printed image. A vinyl plotter is one tool in that workflow: it moves media and a small blade so the blade follows vector paths supplied by software.
That controlled motion can repeat shapes efficiently, but the machine cannot make unsuitable artwork weedable or the wrong film perform outdoors. Understanding the whole process helps a sign buyer ask about minimum feature size, material, color layers, seams, transfer preparation, installer handoff, and replacement rather than just “precision cutting.”
What is a vinyl plotter?
A vinyl cutter or plotter is a computer-controlled cutting device. Many roll-fed sign cutters move the film forward and backward under pinch rollers while a carriage moves the blade across the width. A swiveling drag knife rotates in the direction of travel, so blade offset and corner behavior must be accounted for.
For a typical kiss cut, the tool penetrates the face film but leaves the release liner usable. After cutting, unwanted film is removed during weeding. Application tape may then hold separate letters or shapes in registration while the graphic is transferred to a compatible surface.
Flatbed cutters, tangential tools, perforation methods and print-and-cut systems use different mechanics. A file and media suitable for one device may not be safe or practical on another.
Why use a plotter for sign making?
Cut film is useful when the design and material call for:
- clean spot-color shapes: letters and logos can use the manufactured film color without a printed edge;
- specialty film properties: selected reflective, translucent, frosted, masking or other constructions may be supplied as cut media;
- repeatable replacements: controlled files and stock records can support later matching, subject to material and color changes; and
- efficient nesting: repeated vector parts can be arranged to use roll width, though weeding, margins and grain or pattern direction still affect yield.
Cut vinyl is not automatically sharper, cheaper or more durable than print. Fine multicolor artwork can create many layers and registration points; gradients and photographs need another method; and every film has exposure, substrate and removal limits.
How should a vinyl cutter be selected?
Match the machine to real work rather than a hobby-versus-professional label:
- usable cut width and media handling: include edge margins, pinch-roller zones, roll weight, sheet support and the longest practical tracked run;
- drive and tool control: motor type, acceleration, servo or stepper behavior, drag or tangential cutting and available force affect different details;
- tracking and feed: roller condition, media loading, prefeed, floor support and environmental stability matter on long graphics;
- optical registration: sensor type, compatible marks, software and calibration control contour cutting around printed graphics; and
- workflow and service: drivers, file support, network, replacement parts, training, maintenance, support and safe work area affect uptime.
SignWarehouse's beginner cutter overview provides general equipment context. Treat any comparison as a starting point and verify current manufacturer specifications, supported media, safety instructions and service for the named model. Do not infer equipment from this article.
How is a cut job set up?
1. Prepare production artwork
The cutter needs deliberate vector paths, not simply a high-resolution image. The artwork setup guide explains the customer file handoff. Production preflight then closes open paths where required, removes duplicates, simplifies unnecessary nodes, outlines approved type when licensing permits, defines cut colors or layers, and checks minimum strokes, counters, corners, and weedability at final size.
- Separate colors and production operations so the operator cannot accidentally cut a print, score or crease path as ordinary vinyl.
- Add approved registration and alignment features without leaving unwanted marks on the finished surface.
- Confirm orientation, especially for second-surface glass, masks and heat-transfer materials that may require mirrored output.
- Preserve the approved artwork and create a controlled production copy rather than editing the only source file at the cutter.
2. Identify and load the media
Record the manufacturer, product, color, lot if relevant, width, liner, face direction and condition. Inspect telescoping, curl, damaged edges, contamination and storage history. Place pinch rollers only in permitted grit-roller zones, align the roll, provide slack or a supported feed path and prefeed when the machine procedure calls for it.
A crooked or dragging roll can shift over a long job. Stop if the media approaches a roller edge, lifts, wrinkles or strikes the stand; do not reach into moving equipment.
3. Establish blade and cut settings
Variables commonly include:
- blade geometry and condition matched to film thickness, detail and manufacturer guidance;
- blade extension limited so the holder and tool work as designed rather than exposing excessive sharp edge;
- force, speed and acceleration adjusted to the material, liner, feature size and machine condition; and
- offset, overcut and tool-specific controls calibrated to close corners without hooks or liner damage.
There is no universal force or speed. Too much blade extension is not corrected by lowering force; it can score liners and the machine. Follow lockout, blade-handling, guarding and tool-change instructions, and keep hands clear of the carriage and rollers.
4. Run and inspect a test cut
Use the machine's approved test shape or a representative production sample on the actual media. It should weed cleanly at the required features while leaving the liner functional and the cut strip unharmed. Inspect corners, small counters and release—not only a large square. Repeat after changing blade, stock, laminate or other conditions that affect the cut.
What is weeding and what makes it controllable?
Weeding removes non-image film while keeping intended islands, punctuation and small counters in position. The cut file should make that work reasonable rather than transferring all complexity to a person with a sharp pick.
- Set a realistic minimum feature and spacing for the named film, size, quantity and installer.
- Add weed borders or sectional breaks where they will not create confusion or waste.
- Use suitable lighting, magnification, posture, gloves or other protection required by the tools and media.
- Compare weeded output with the proof so a missing dot, counter or letter is caught before transfer tape.
Tearing, lifted letters or liner cuts can indicate artwork, blade, force, media or environmental problems. Do not assume every difficult weed only needs a sharper blade.
How is cut vinyl prepared for installer handoff?
Application tape temporarily holds separate cut elements for transport and field transfer. Tack and stiffness need to suit the face film, liner, graphic size, and customer-verified target surface. Too little pickup can leave pieces behind; too much can distort thin letters or make release difficult.
- Apply tape with controlled overlap and pressure, avoiding wrinkles and contamination.
- Label panels, colors, orientation, alignment marks and sequence before the liner is removed.
- Identify the exact film and transfer material so the installer can follow the manufacturer's surface-preparation and application instructions.
- Include the approved layout or registration references without prescribing a universal hinge, wet-application, tape-removal, or field technique.
Curves, recesses, large panels, vehicles, reflective film, and specialty glass require additional product-specific skill. See the installation-ready production and handoff guide rather than treating transfer preparation as the end of production. The customer and qualified installer own final measurements, surface verification, access, application, and field safety.
Which materials may be plotter cut?
Subject to the exact equipment and product approval:
- pressure-sensitive sign vinyl for selected lettering, logos, decals and overlays;
- frosted, translucent and reflective films with their own blade, tracking, application and exposure needs;
- paint, etch or sandblast masks selected for the coating, abrasive, substrate and removal process;
- heat-transfer films through a separate mirrored, carrier and heat-press workflow governed by the garment and film data; and
- paper, cardstock, thin magnet or specialty media only when the cutter, tool and manufacturer explicitly support the thickness, particles, magnetism, liner and feed.
Magnetic vehicle signs are commonly printed or otherwise produced as larger sheets; a reference to “thin magnet” in a cutter list does not establish road-safe vehicle-sign construction or this shop's capability.
Which controls improve cut quality?
- Use controlled files and samples: record artwork revision, media, blade, settings, orientation and an approved first article.
- Inspect rather than schedule blade changes by weeks: test-cut quality and machine guidance determine replacement.
- Maintain the feed path: clean rollers and carriage areas and replace cutting strips only through the documented service procedure.
- Condition and store media correctly: heat, humidity, edge damage, dust and aging can affect tracking, adhesive and release.
- Design for weeding and handoff: a path that the plotter can trace may still be impractical to weed, transfer, apply or read.
Quality control should include spelling, dimensions, quantity, color, mirror direction, cut completeness, liner condition, missing pieces, transfer tape and a final proof comparison.
When should a sign-production partner be involved?
In-house cutting can make sense for an organization with suitable volume, trained staff, controlled files, material storage, safe equipment space, and a reliable inspection process. A sign-production partner may be more appropriate for large graphics, specialty media, contour-cut print, multicolor registration, panel labeling, or coordinated replacement sets. Field surveys, access equipment, surface preparation, and installation are separate customer and installer scopes.
Request a production quote with approved artwork, customer-verified final dimensions, quantity, colors, intended surface, exposure, and desired service period. LA Prime Signs will compare cut vinyl with other supported production methods and confirm the material and achievable detail during review; no particular cutter or stocked specialty film is implied. Site surveys, field measurements, surface testing, access, installation, maintenance, and field warranties are not included.
FAQ
Which materials can a vinyl plotter cut?
It depends on the cutter, blade holder, tool, force, feed system and material. Common sign cutters handle selected pressure-sensitive vinyl and may support reflective, frosted, stencil, heat-transfer or other films. Magnet, paper, sandblast mask and specialty stock require explicit equipment and product approval.
How often should a plotter blade be replaced?
There is no universal interval. Replace or service it when inspected cut quality, test cuts and manufacturer guidance show wear, damage or contamination. Media type, liner contact, force, debris and volume can change blade life dramatically.
What is a kiss cut?
A kiss cut passes through the face film while leaving the release liner sufficiently intact for handling. Correct depth is a controlled setup result; excessive blade extension or force can score the liner, dull the blade, damage the cutting strip and cause tracking or weeding problems.
Can a plotter contour-cut a printed graphic?
Some systems use optical sensors and registration marks to align a cut path to print. Printer-to-cutter calibration, mark placement, media distortion, lamination, lighting, sensor compatibility and allowable error determine the result. Contour cutting is not available or equally accurate on every machine.
What causes jagged or incomplete cuts?
Possible causes include an unsuitable or worn blade, too much extension, wrong force or speed, incorrect offset, poor vector paths, tiny details, media movement, dirty rollers, damaged cutting strip, adhesive buildup or material outside the machine’s limits. A controlled test cut helps isolate the cause.